

 So what exactly do these places all have in common? Easy peasy. These little, oh-I-don't-know habitats are some of my favorite places! Today I have a bit of a DIY to help you lot find your favorite hiding spots. I've composed a list of places that I love and feel most happy, thoughtful and/or comfortable in. Be sure to share yours if you have any through comments! Note: these specials aren't in any particular order, so don't be all, "MY house should be number ONE because it's AWESOME; WHY isn't it even on the JOLLY-well darn LIST?!" and do an angry dance a la Billy Elliot. Just don't, please.
~The Infamous List~
1. Sitting in my
Japanese maple tree, preferably listening to my portable radio and reading
2. Strolling around a posh
city with GANGNAM STYLE
3. Dipping my feet in
Jezebel's lake house lake
4. Eating
mozzarella sticks at the
kitchen counter
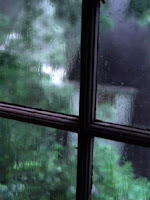
5. Gazing out my
raindrop-encrusted window while listening to some alternative music (or Pink)
6. Swinging on any old
abandoned park swing against the wind
7. This amazingly peaceful place called
Land's End in San Francisco; it used to be this old baths place but now it's just kind of like a nature reserve
8. My comfy beige
chair in my room where I listen to my iPod and write letters to acquaintances
And d'you know what? That's about all I can think of right now, so let's get it started on the do-it-yourself part of this post. New paragraph...
So it's pretty darn simple to discover what your favorite places are, but there are a few rules and regulations that you must perform first. Numero uno is to--obviously--listen to your favorite music, because if you're an avid music fan like me and every other tween/teen girl in this technology-based world, you know that listening to music is a temporary cure for almost any problem. Just turn on your musical device and listen to your choice of Michael Jackson (dur), or Maroon 5, or Queen, or the Archers of Loaf, or something along those lines. I repeat: easy peasy.
Second rule of initiation--you should probably look around a lot. Y'know, just kind of examine what setting you're in. Say you're in New York City. If you check out all the noises and smells and buildings and such, you'll get a sense of whether or not you actually like the place you're in.
Third rule--if you can, doodle a little, cause doodling is (a) fun and (b) superbly creative. And that's about all there is to it.
Yours truly,
TAFKA Pinky


